Overview:
Students will analyse the symbiotic relationship of river systems and communities by creating a replica river system with the option of having a flooding river or running river.
Time:
20 mins
Lesson Materials:
*You can use the document in the link below to either: tailor the experiment to your needs or to have a printable version of this lesson plan*
The plan is editable and printable. Copy the Google Doc in your own drive and make edits or you can just print.
River Model Lesson Video:
Learning Objectives:
- Build a river.
- Analyze the effects of river flooding.
- Observe how the flood renewed the farmlands for nutritious soil for crops.
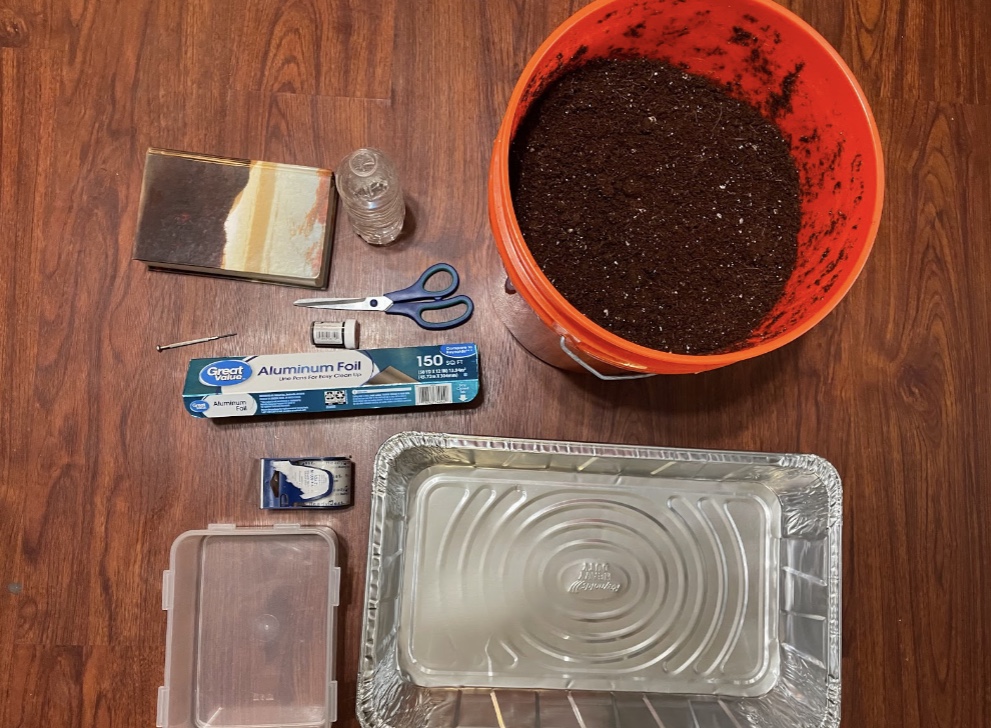
Materials Needed:
Materials:
- 1 Foil Pan
- Either a 9×13 or a 21 x 13”
- Dirt
- 2 quarts per student or 0.07 of a cubic foot bag for a 9×13 pan
- 5 quarts per student or 0.16 of cubic foot bag for a 21 x 13 pan
- Water
- Bottle with narrow opening
- Alternatively, use a plastic cup with a hole punctured on the side.
- Aluminum Foil
- ~2 feet per student
- Tape
- Scissors
- Nail
- Book/Box
- Small Bowl
Optional Materials:
- Food coloring
- Pebbles
- Seeds
- chives grow fast and easy at room temperature
- Sand
- 1lb of sand=1.25 cups
- ~¼ – ½ cup per student
- 2-4 Coffee filters
Experimental Methods:
Part 1. Setup the River Model
- Fill your bottle with water and add your blue food coloring (food coloring optional).
- Find a picture of your favorite river online.
- Fold your aluminum foil into the shape of the river you choose (keep in mind the size of your aluminum pan).
- Place the aluminum foil into your pan and flatten the bottom of your foil to the pan to start creating a river bed.
- Secure the foil to the pan with sections of tape on the bottom of the foil.
- Trim the ends of the foil to better fit your pan if necessary.
- After the aluminum foil is set in the pan, model the landscape around your river with pebbles, sand, etc.
- Poke holes into the end where you want your river to end .
- Set up your bowl on the end with the holes.
- Raise the other end without the holes higher than the side with the holes in order for gravity to pull the water down river.
- Pour the water.
Part 2. Test the River Model
Test 1: River Shape
- Change the shape of the river.
- How does the shape affect the flow of water?
Test 2: River Slope
- Change the slope of the river by increasing or decreasing the books under the pan.
- How does the slope affect the flow of water?
Test 3: River Speed
- Change the speed of the water you pour.
- What happens when you pour the water faster or slower?
Test 4: Sediment or Silt
- Place sand at the bottom of the river.
- Place a coffee filter to collect the sand.
- Pour the water at different speeds.
- Measure the sand to compare the amount of sand being carried away at different speeds.
Part 3. Variations
Variation 1: River Flooding & Optionally Grow Seeds in a Flood Plain
- Cover the holes with tape
- Lay the pan flat
- Add water until it starts to overflow.
- Water will now reach a larger portion of soil.
- Plant seeds into the wet soil.
Variation 2: River Pollution
- Pollute river with candy wrapper, oil, etc. to show effects of pollution.
- River will get clogged up with trash
Expected Experimental Results:
Students should expect to see a river flowing downstream. Students should also expect to see the effects of a clean river and a polluted river. Lastly, students should expect to see how water gets to different parts of the land through bifurcation and flooding. If students did plant seeds in soil, the seeds will sprout thanks to the flooding.
Demonstration Ideas:
- Have students add debris and items into the stream to show effects of pollution.
- Add river bifurcation and flood the river to show the effects of the overflow on different places.
Questions to Think About:
- How can you improve the design/experiment?
- What materials could you use instead?
- Why did we see two different outcomes?
- What would happen if we used a different height?
- Why do you think that pollution is harmful?
- Where does the garbage go?
- Why were early civilizations built around rivers?
- How does soil become rich from flooding?
Questions to Think About:
- How can you improve the design/experiment?
- What materials could you use instead?
- Why did we see two different outcomes?
- What would happen if we used a different height?
- Why do you think that pollution is harmful?
- Where does garbage go?
- Why were early civilizations built around rivers?
- How does soil become rich from flooding?
- How is the river part of the water cycle?
Chemistry:
Due to the water cycle and gravity water flows downstream. As the water flows downstream it erodes rocks and carries away the silt. When the river floods the silt and organic material (animal, plants, life) from the river washes up to the surface of the land. This provides for rich fertilizer for the soil. For example, seasonal rains in the Ethiopian Highlands prompt the annual summer flood of the Nile River.
Society:
This project shows the importance of rivers on society. Students will see how flooding enables the river to deliver nutrients and water to dry areas that would not have been reached without the flooding. Without the river, societies would not have been able to provide water for crops and people would starve. The plow allowed for mass production of food, which ultimately led to the creation of civilizations. Rivers also allowed for travel to distant lands and trade. Human proximity to the rivers has increased the pollution in rivers.
Logistics:
STEAM Subjects:
Science (Chemistry) and Art
Science Vocabulary: River Bifurcation – River bifurcation occurs when a river flowing in a single stream separates into two or more separate streams which continue downstream
References:
Shaw, Ethan. “Why Does the Nile Flood Each Year?” Sciencing, 2 Mar. 2019, sciencing.com/nile-flood-year-7357627.html.
Funding:
CSU Internal Funding Sources:
- IRA (Instructionally Related Activities Fund)
- Faculty Small Grant
External Funding Sources:
- Adobe

